MNS hướng dẫn cấp quyền sao lưu cho dữ liệu quan trọng trên G-Suite
G Suite là một bộ các công cụ như Gmail, Calendar, Drive, Docs, Sheets, Slides, Forms, Sites, Hangouts, Sites, Vault,…được xây dựng trên nền tảng điện toán đám mây của Google giúp bạn có thể kết nối bất kỳ ai, ở bất cứ đâu, trên bất kỳ thiết bị nào.
Kèm theo đó là những dữ liệu quan trọng trong doanh nghiệp, Synology cung cấp một giải pháp có thể giúp bạn sao lưu tất cả dữ liệu trên G Suite bằng phần mềm Active Backup for G Suite. Để sao lưu được dữ liệu trên G Suite chùng ta phải làm việc với tài khoản Google để cấp phép cho chúng.
Dưới đây MNS sẽ hướng dẫn bạn thực hiện việc cấp quyền truy cập cho phép sao lưu dữ liệu từ G Suite bằng Drive SDK API:
- Đăng nhập Google Admin Console với thông tin xác thực domain mà bạn muốn sao lưu bằng Active Backup cho G Suite.
- Nhấp App > G Suite > Drive and Docs > Fuature and Application
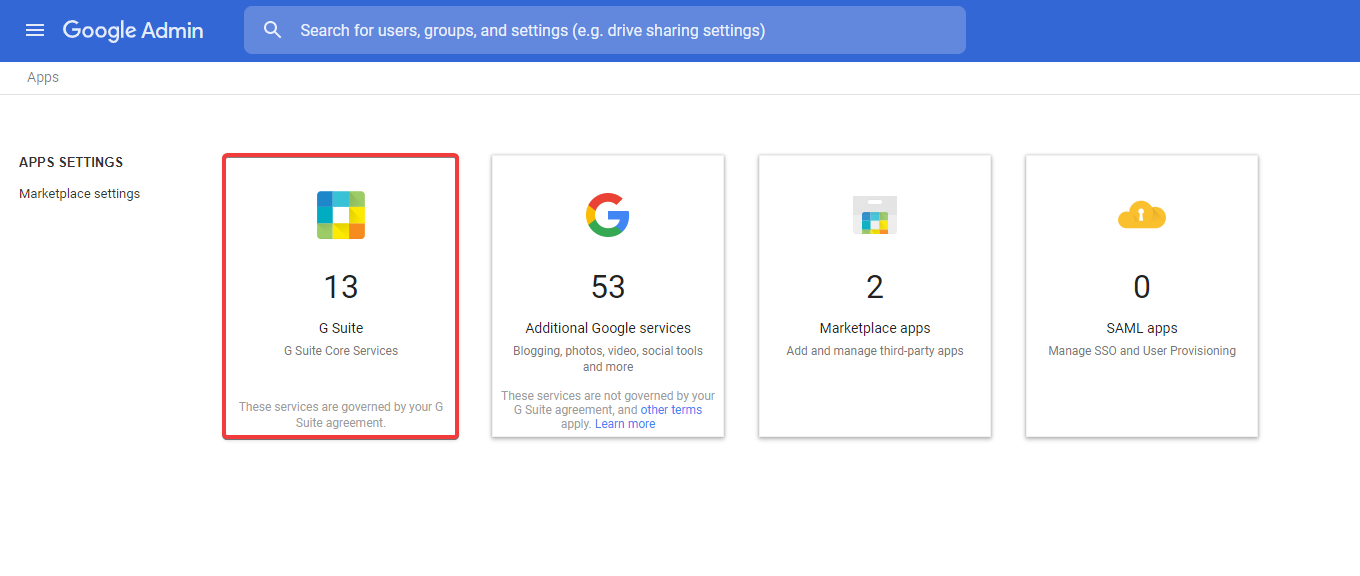
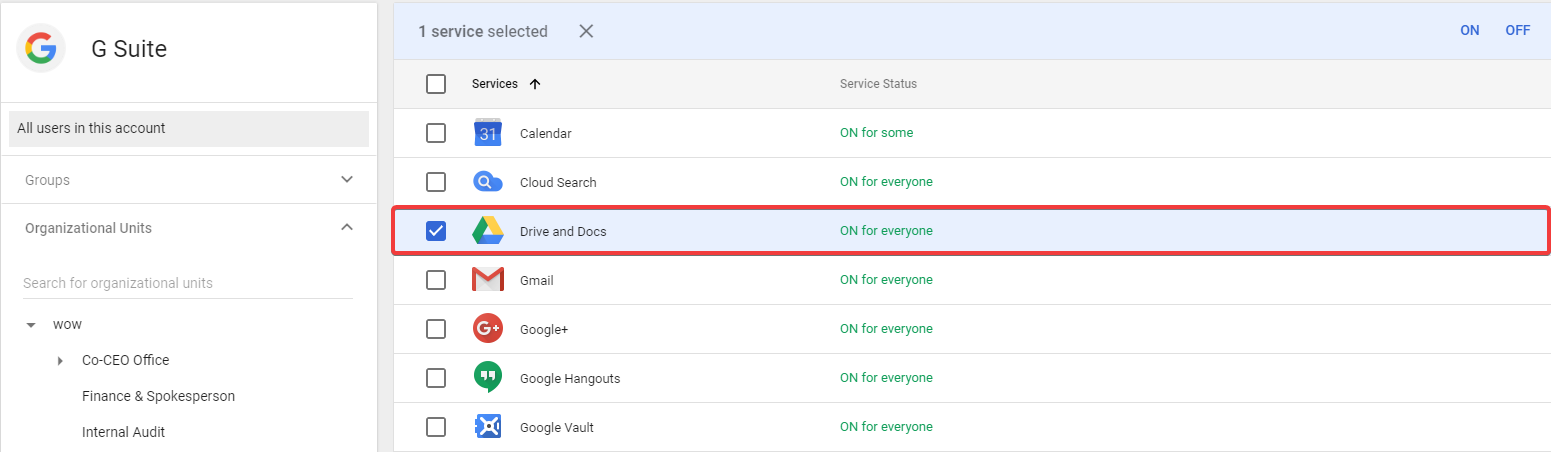
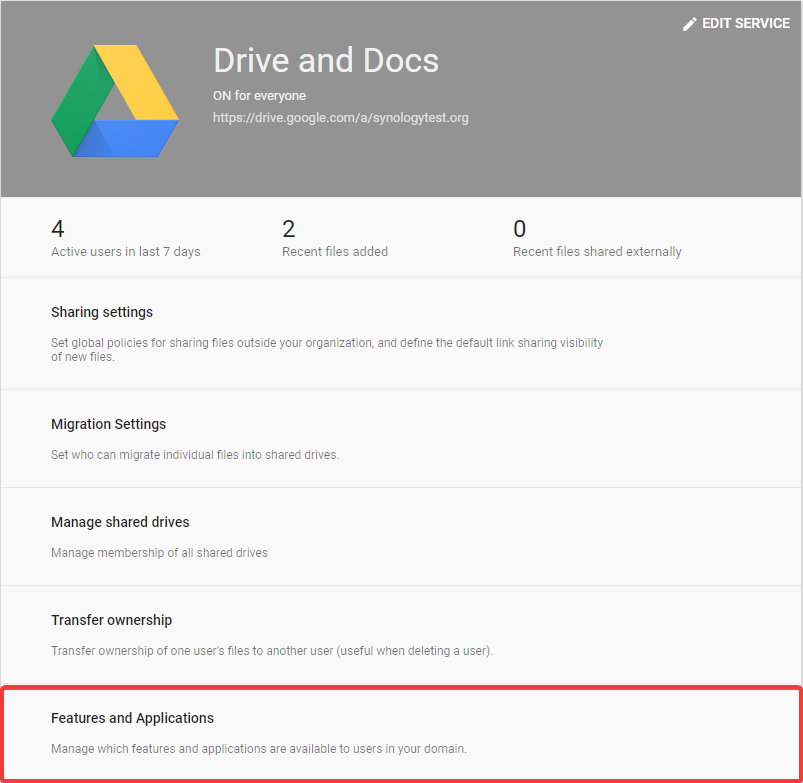 Bảng điều khiển dành cho admin của G Suite
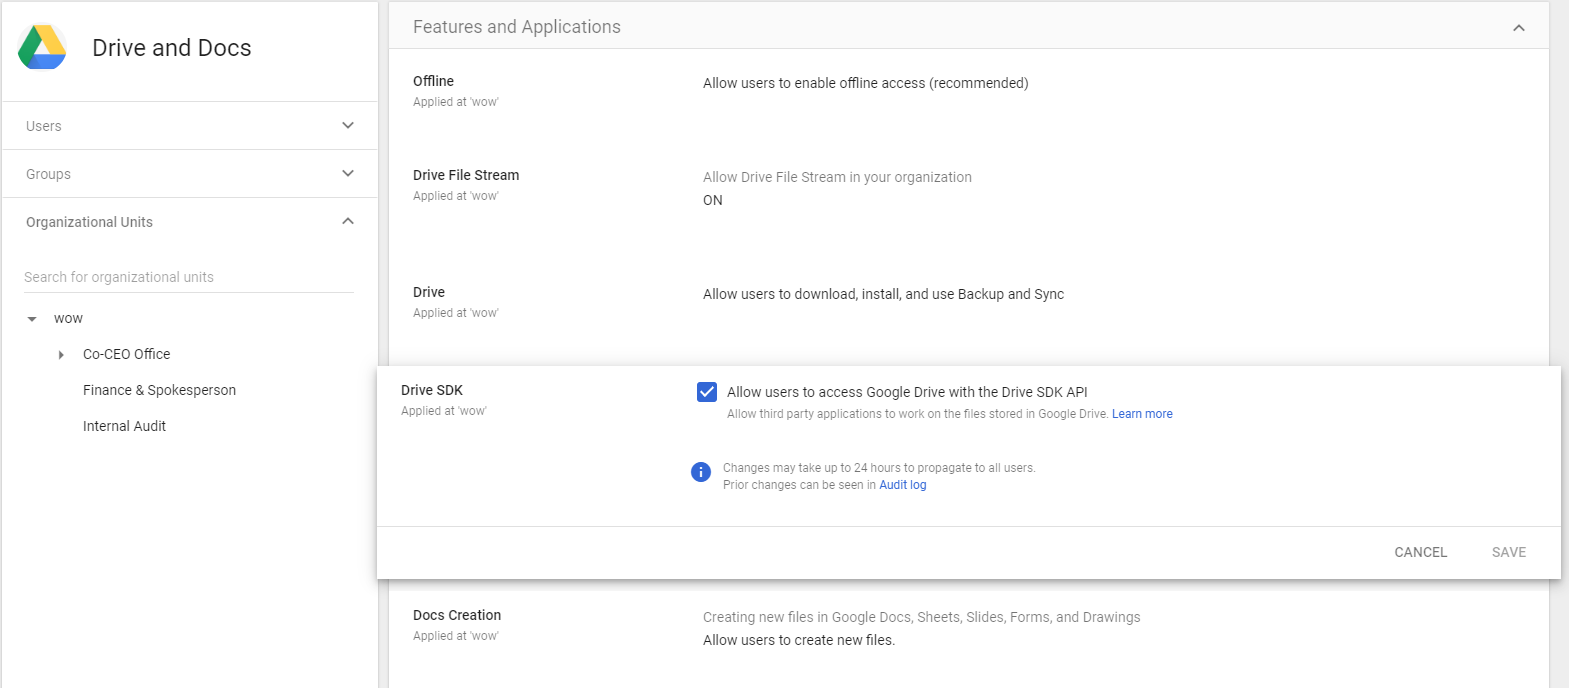
3. Kích hoạt tính năng Allow users to access Google Drive with the Drive SDK API
Khởi tạo Service Key cho Active Backup G Suite
- Đăng nhập tới Google Developers Console với quyền truy cập admin cao nhất.
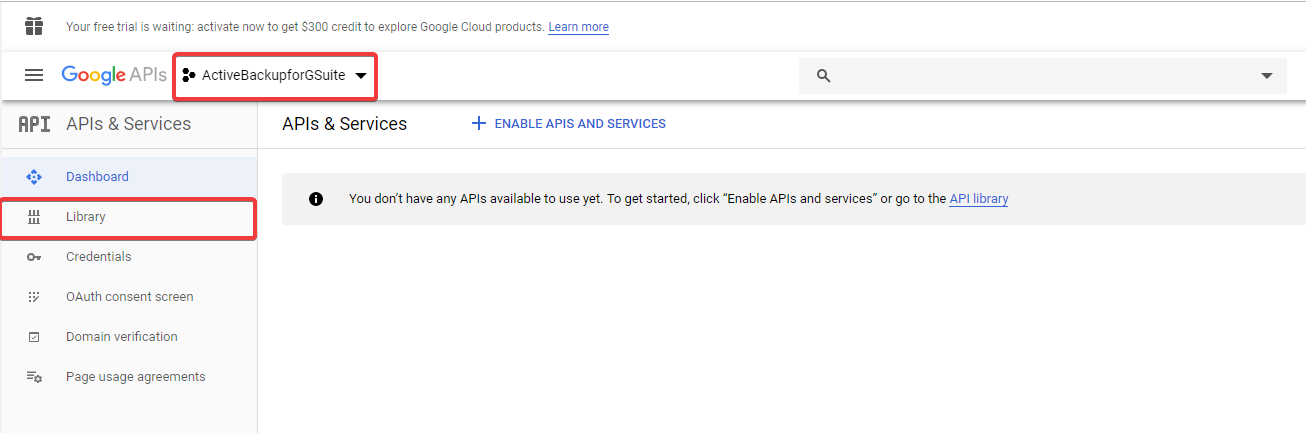
- Chọn Select a project > New project bên phải hộp thoại, và đặt bất kỳ cái tên gợi nhớ nào cho dự án mới này ví dụ như “ ActiveBackupforGSuite”.
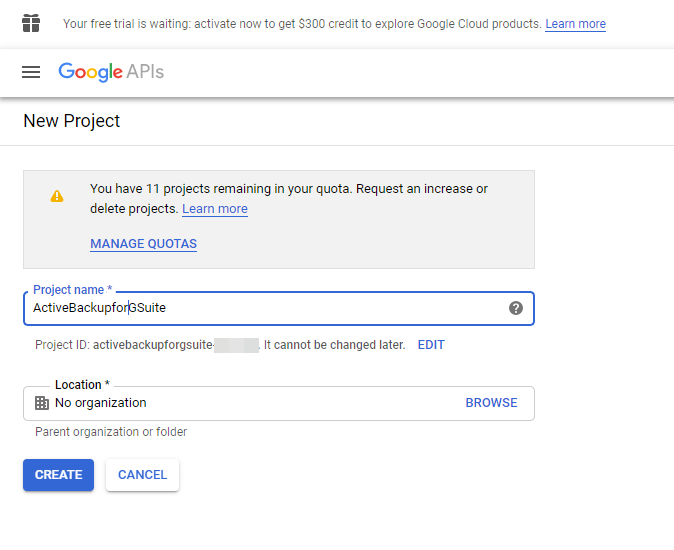
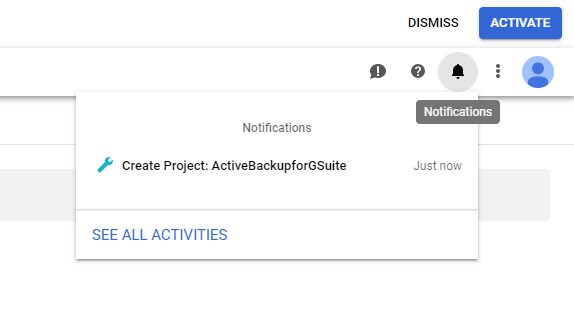
- Sau khi tạo xong đươc dự án bạn sẽ nhận được thông báo.
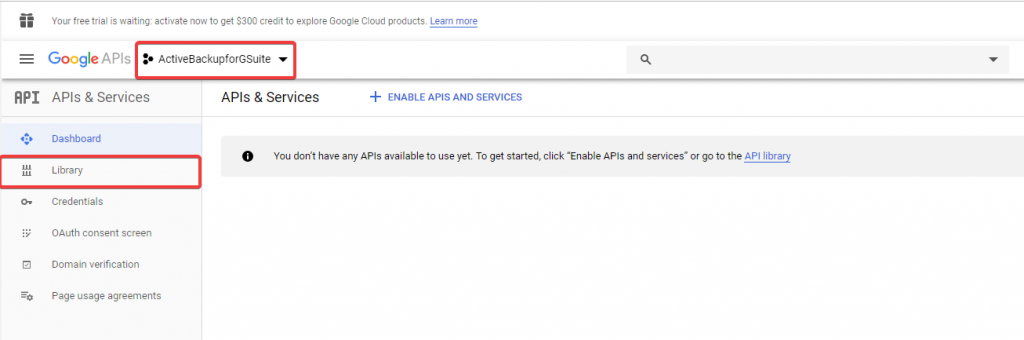
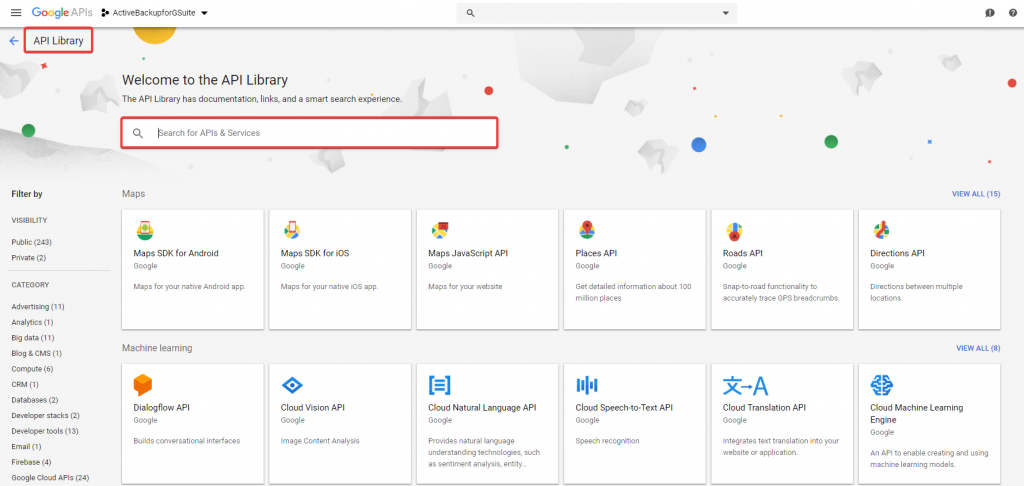
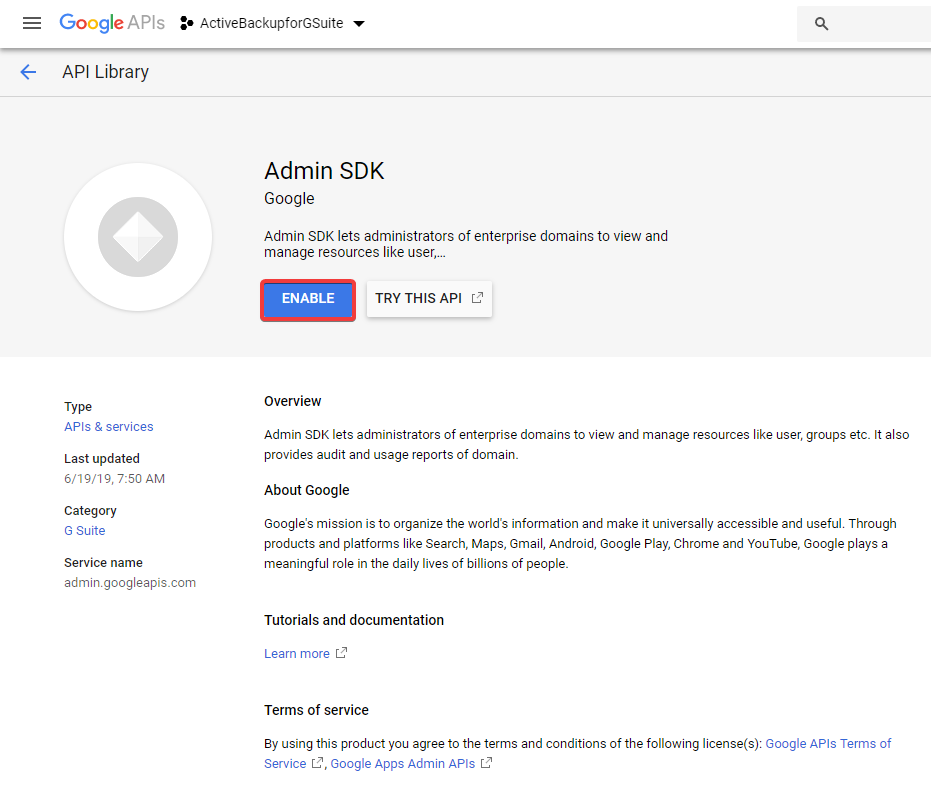
- Chọn dự án mới tạo của bạn. Đi đến Library, chọn Tìm và Enable các APIs theo danh sách sau: Admin SKD, Audit API, Contracts API, Gmail API, Google Calender API, Google Drive API.
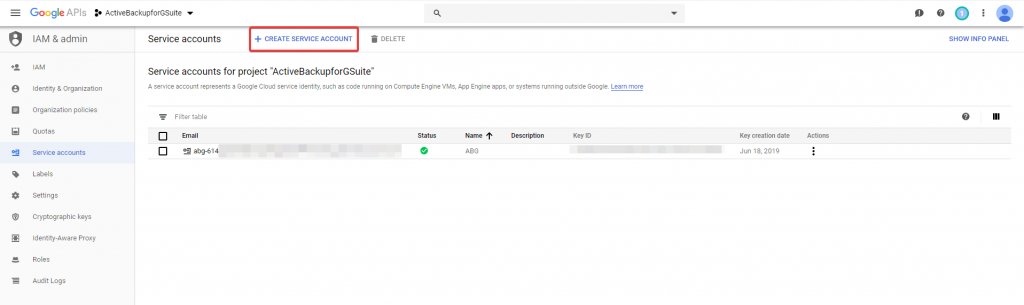
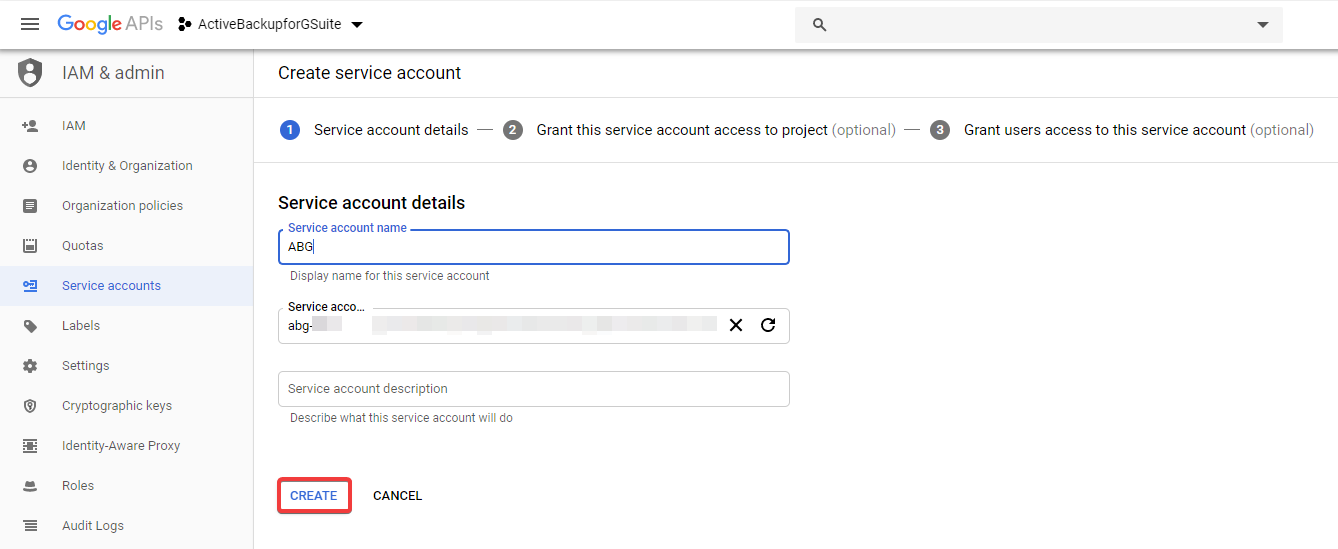
- Sau khi Enable ở bước 4, Chọn nút Menu ngang bên trái màn hình , Chọn JAM&Admin > Service account> + CREATE SERVICE ACOUNT.

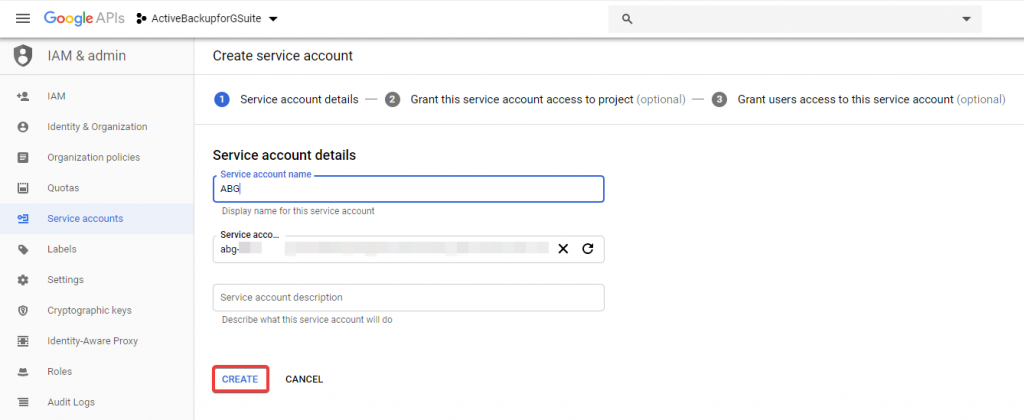
- Chọn Service account name, sau đó chọn Create.
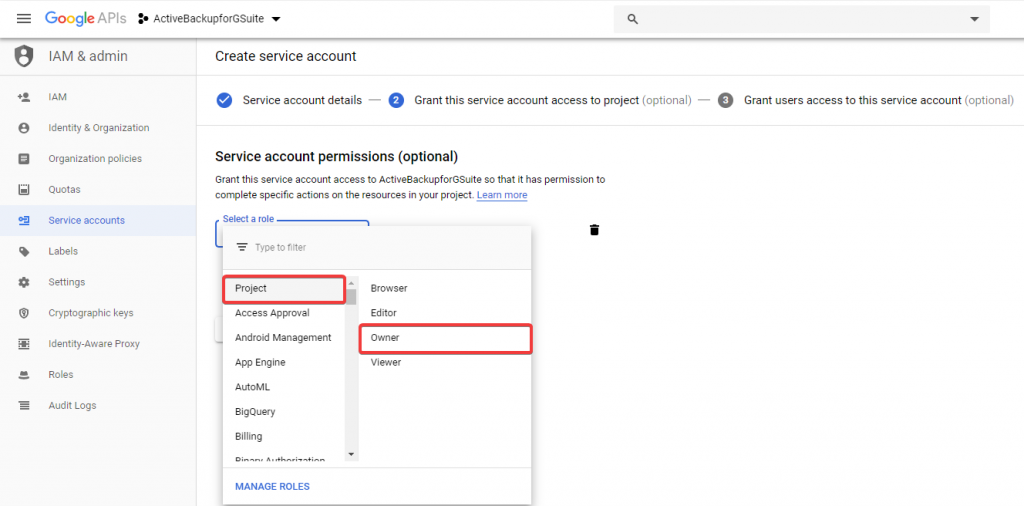
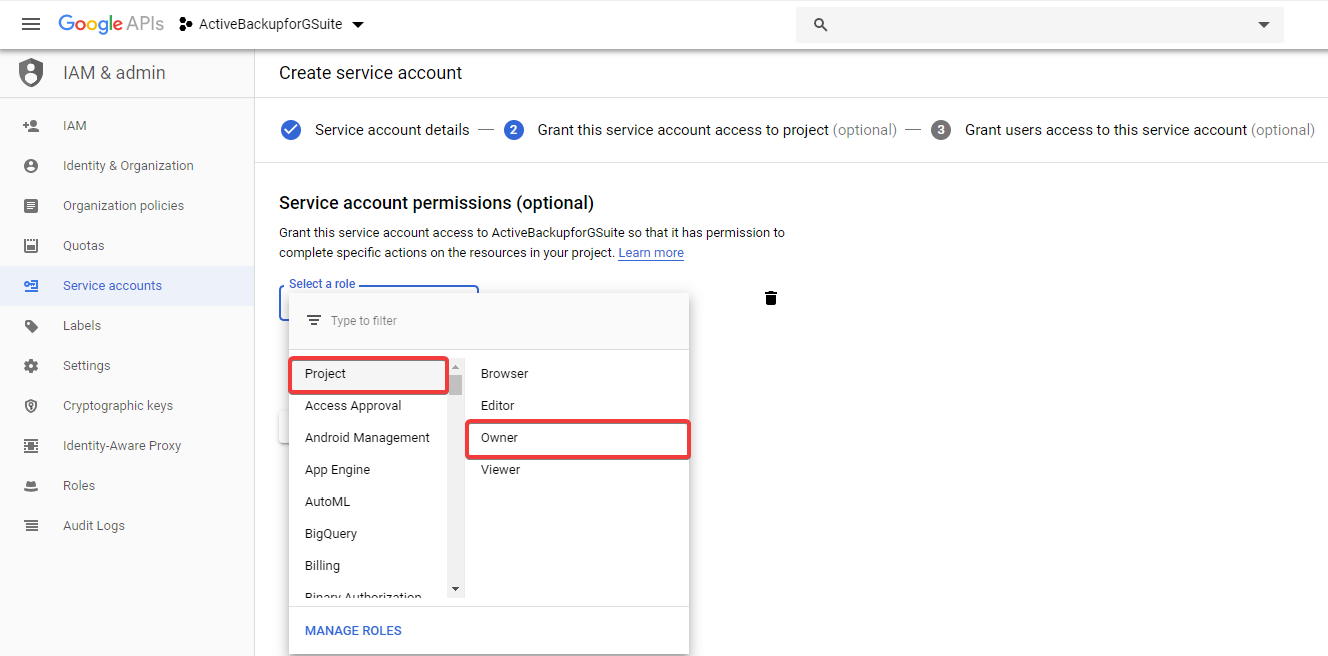
- Selecte Project > Chọn quyền sở hữu dự án là ai Role, Chọn Continue.
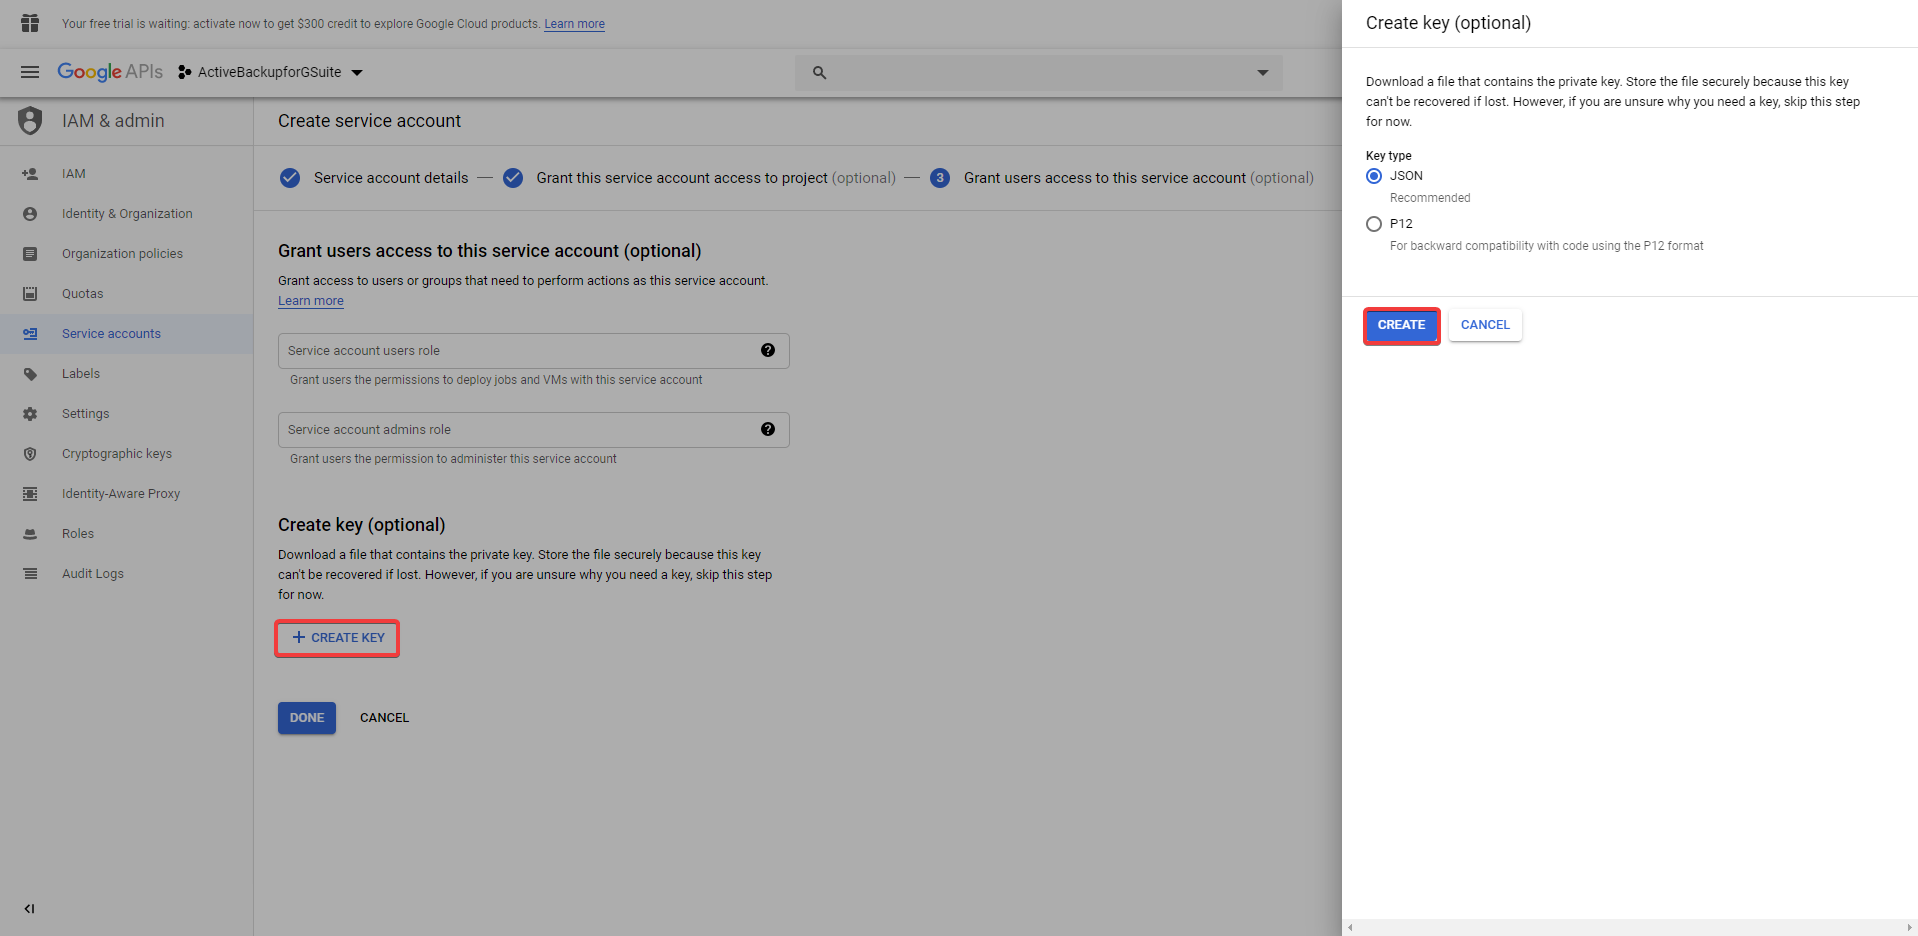
- Chọn Create key (optional)và chọn nút + CREATE KEY. Đánh dấu JSON ở bảng thông báo bên phải, nhấp CREATE, private key sẽ tự động được tải xuông máy tính của bạn.
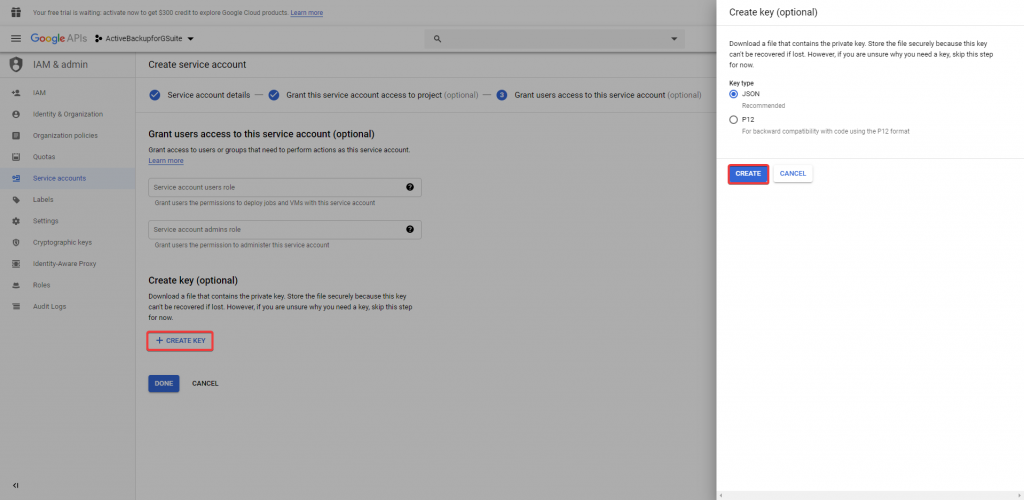

*** Luôn giữ kỹ Primary key này vì nó liên quan tới tài khoản của bạn
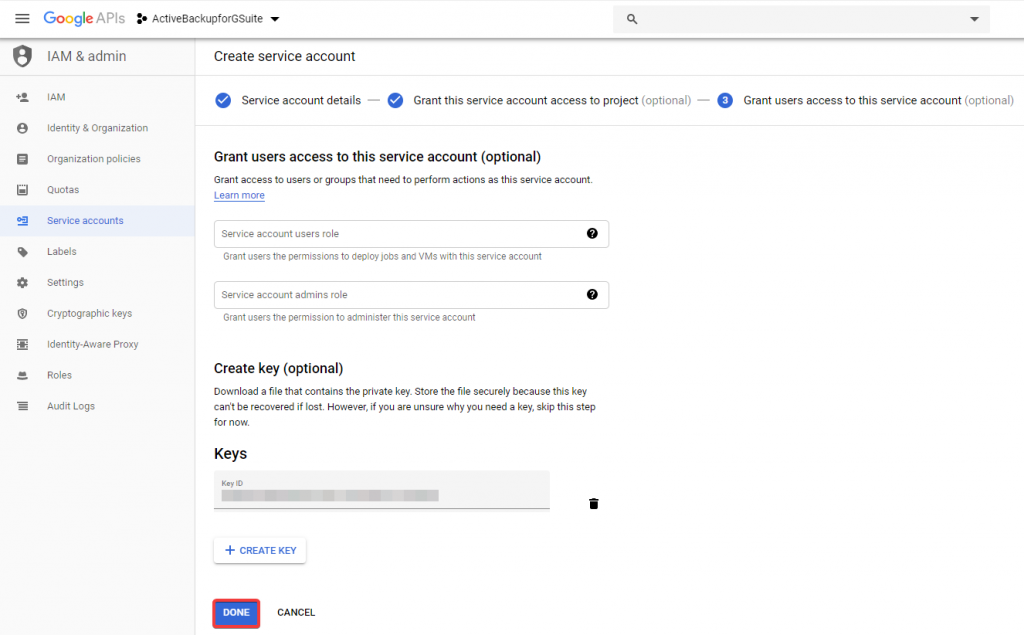
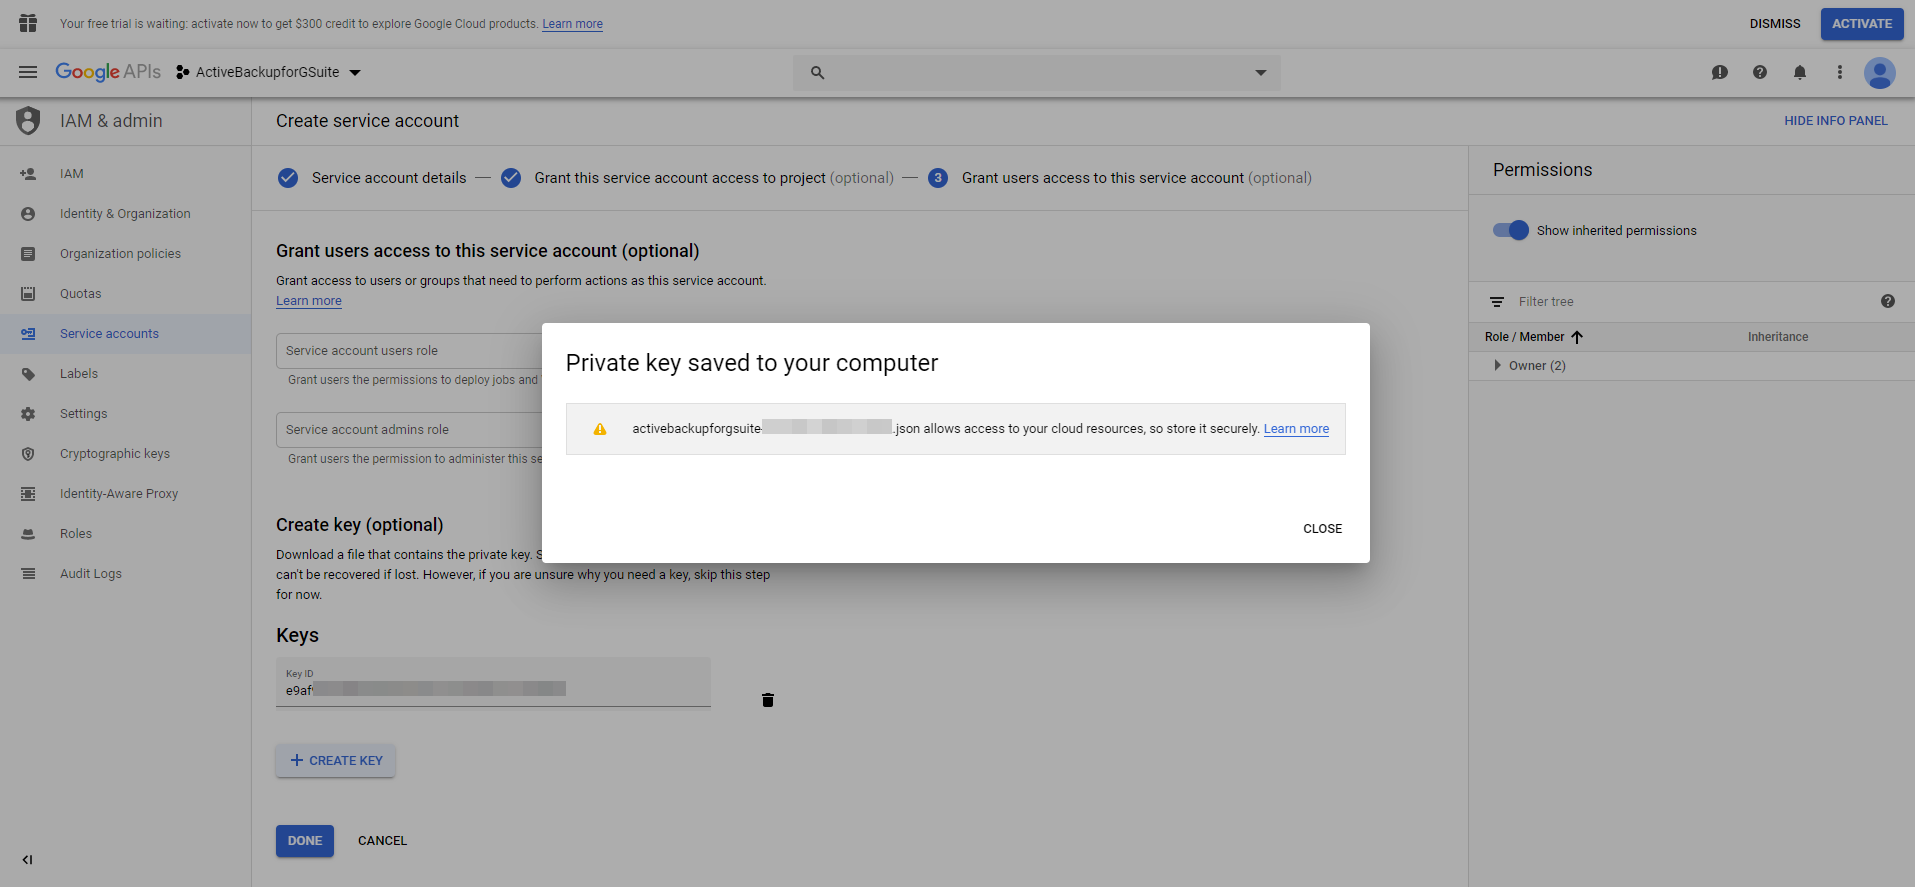
- Chọn DONE để kết thúc cài đặt
 .
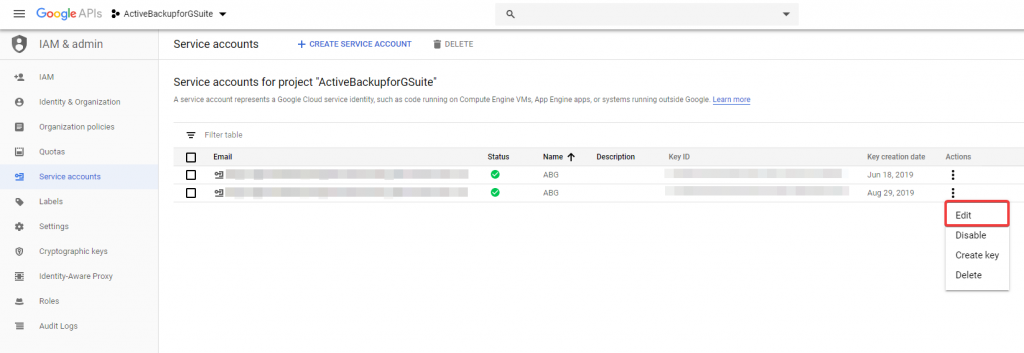
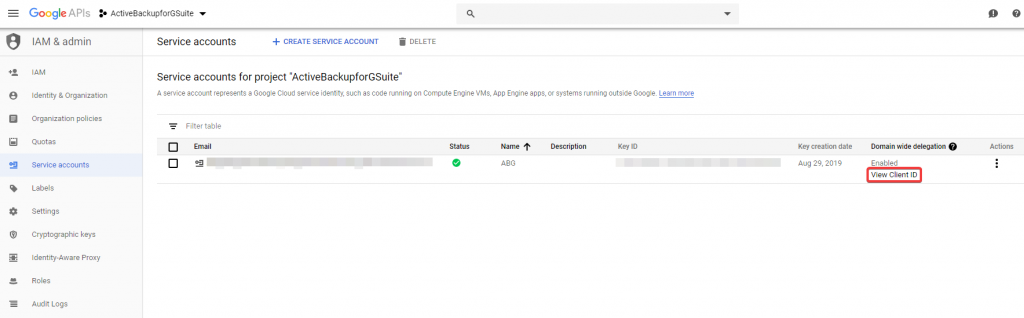
. - Chọn dấu ba chấm bên cột Actions > Edit
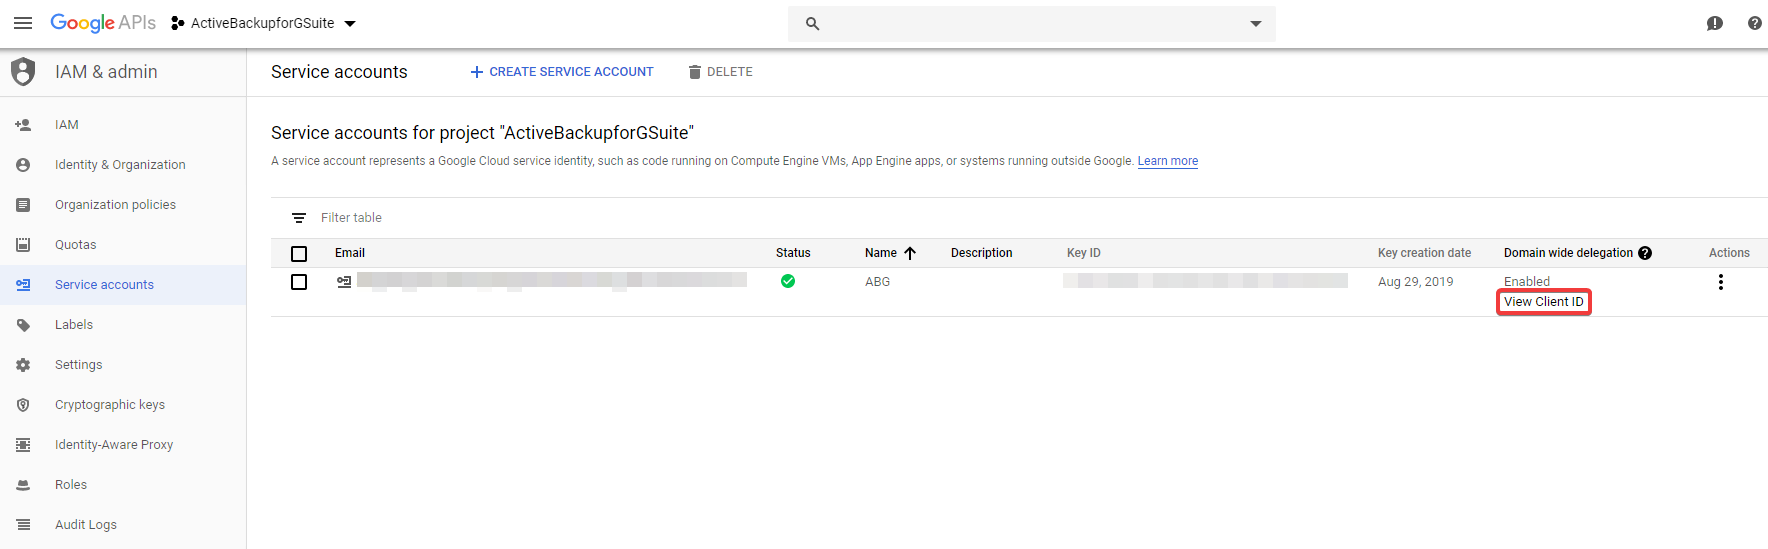
- Chọn SHOW DOMAIN-WIDE DELEGATION. Đánh dấu Enable G Suite Domain-wide Delegation. Nếu bạn được nhắc hãy nhấp vào Product name for the consent screen, chỉ cần nhập Active Backup for G Suite. Chọn SAVE.
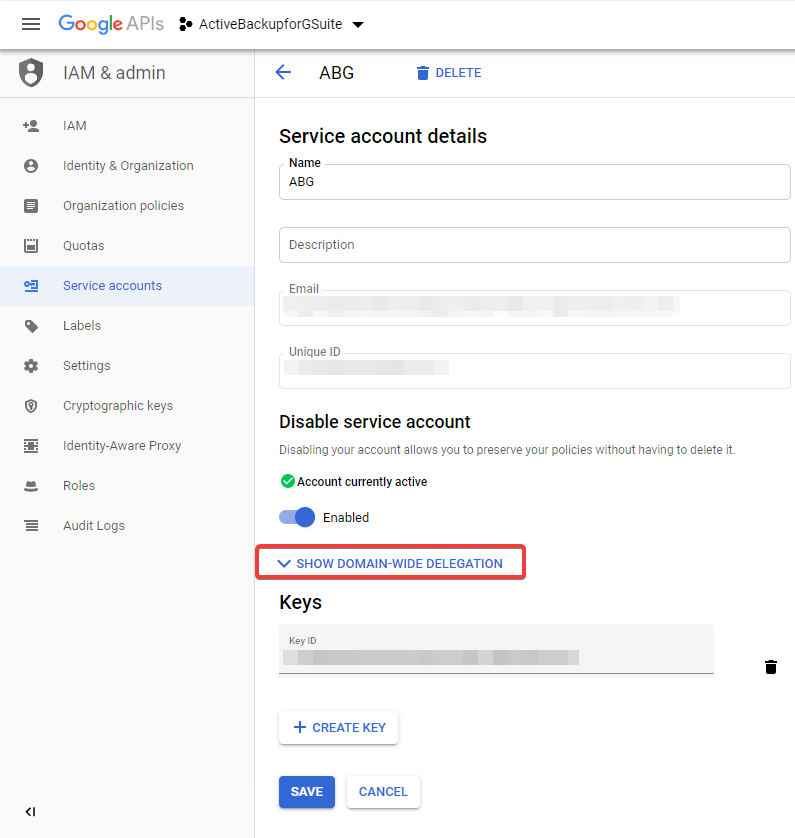
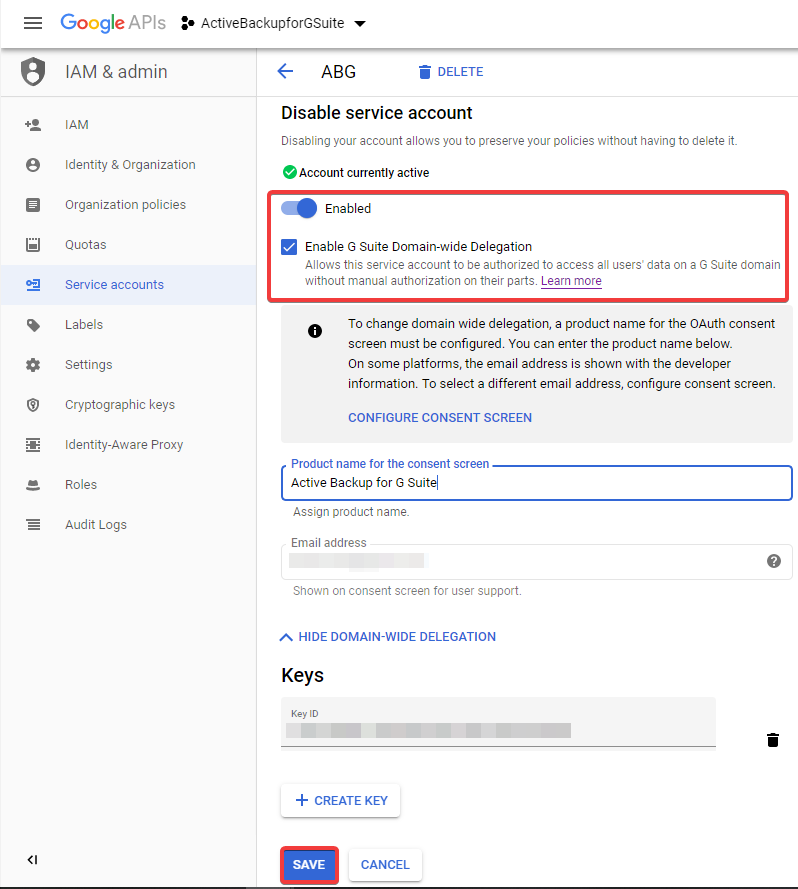
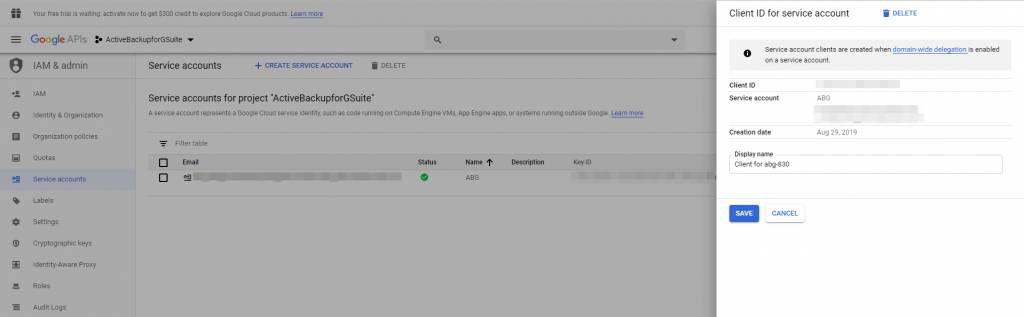
- Chọn View client ID phía bên dưới Domain wide delegation. Copy dòng Client tới nơi lưu trữ (notepad, word…). Lưu ý với bạn Client ID sẽ được sử dụng để ủy quyền domain-wide cho các dịch vụ trên account của bạn.
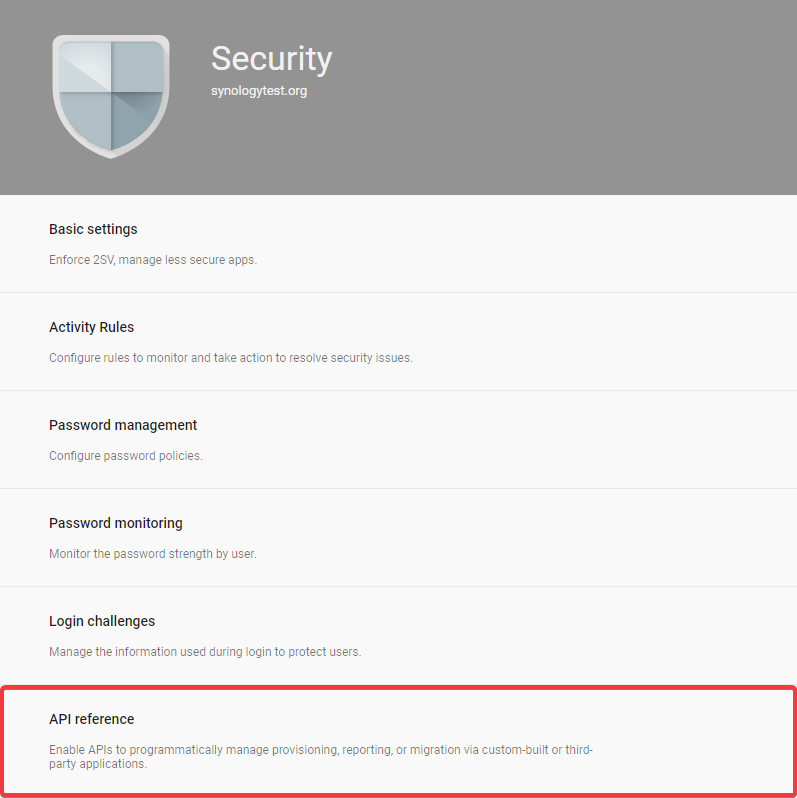
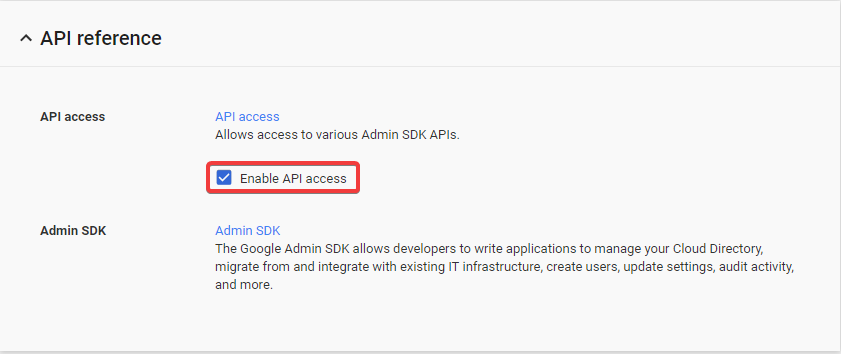
- Đăng nhập tài khoản của bạn tại Google Admin console với thông tin domain xác thực mà bạn muốn sử dụng trên Active Backup for G Suite. Bạn phải chắc chắn Enable API access tại tab Security > API reference đã được đánh dấu.
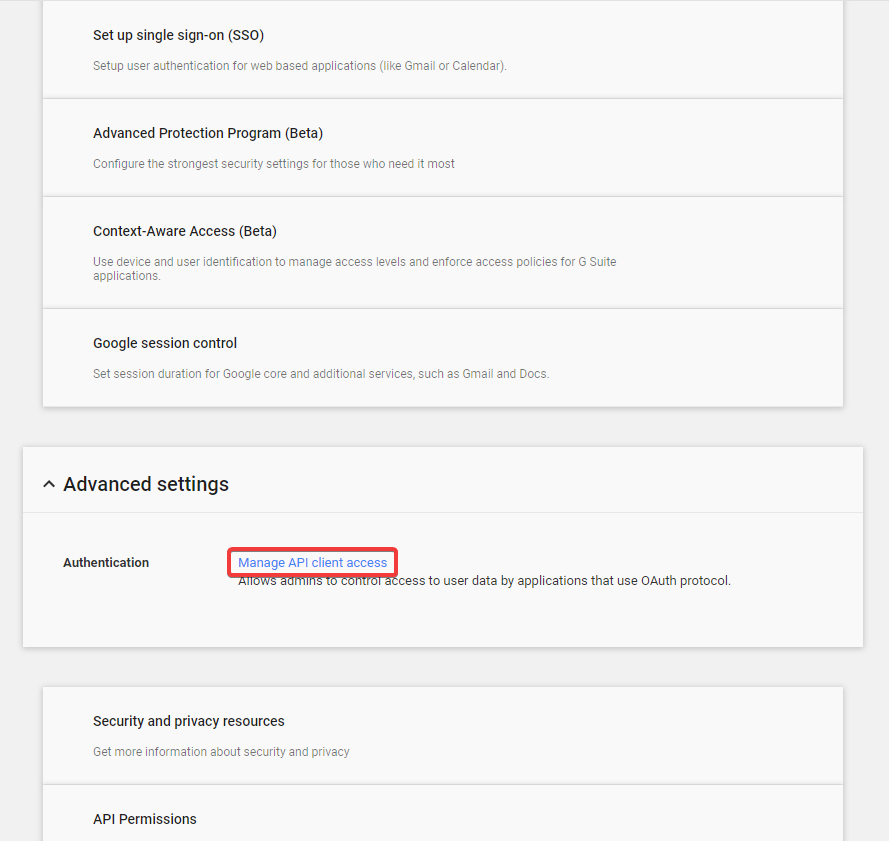
- Chọn Security> Advanced settings > Manage API client access.
- Đánh tên Client Name cũng như One or More API Scopes theo hướng dẫn bên dưới đây. Chọn Authorize để hoàn thành quá trình khởi tạo Service key.
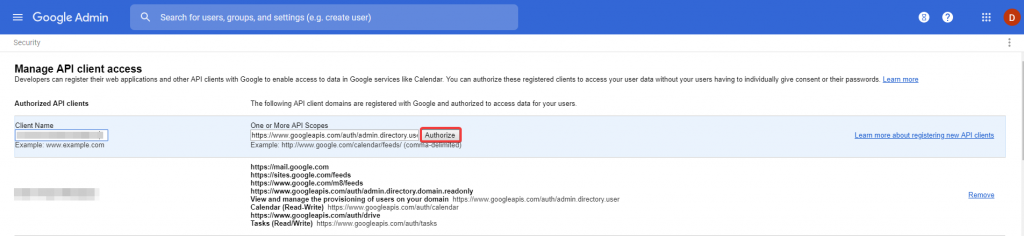


- Client Name: Paste the Client ID that you copied in step 11.
- One or More API Scopes: Please copy and paste the following line:
https://www.googleapis.com/auth/admin.directory.user, https://www.googleapis.com/auth/admin.directory.domain.readonly, https://www.googleapis.com/auth/drive, https://mail.google.com, https://www.googleapis.com/auth/calendar, https://www.google.com/m8/feeds, https://sites.google.com/feeds, https://www.googleapis.com/auth/tasks
16. Khi đã sẵn sàng, vui lòng sử dụng khóa được lưu trữ được tạo ở bước 8 để tiếp tục tạo một tác vụ trên Active Backup for G Suite,
Mọi thông tin về sản phẩm và giải pháp vui lòng liên hệ
:: MNS | Synology
:: Mr. Huy | 094 191 4979 | 028 3815 6606
:: support@mns.vn